
This page is an instruction set on how to configure and use the Twitch Extension Bedrock Spawns. This extension is intended to give users control over your game via exchanging bits/interactions for streamer defined commands happening on your BDS server.
Table of contents
Known Bugs
These bugs were found post approval and will be fixed in future updates:
Version 0.0.2
- Free Redeems don’t give users feedback nor a timer
- Enable Slow mode if using free redeems
Supported Setups
BDS behavior pack
The Bedrock Spawns system uses a behavior pack that heavily leverages the game test framework. This behavior pack may break in future updates as it is experimental. Mojang-Net is new, and it has changed in each update since release. If you are planning on using this it is recommended that you have a version switcher and the ability to stay on a specific BDS version while i work through when and if i can update to newer versions of BDS.
Minecraft Socket connection
For single player worlds, it is possible to use a socket connection using the /connect command. To do this you need to be in a world where you have OP. and run /Connect. This requires allowing loop back on your Minecraft version. This is also very useful for testing your commands setup without running Minecraft. Each command that is executed is published to local command line.
Configuring Minecraft
Each server setup is a bit different, these sections are to allow you to set up you own version.
Behavior pack (BDS only, Version 1.19.20)
Place the behavior pack in you BDS behavior pack folder and unzip like any other behavior pack. ./behavior_packs
Add the behavior pack to the world you want to play ./worlds/[NAME OF YOUR WORLD FOLDER]/world_behavior_packs.json should contain at least the following, you may have other behavior packs as well
[
{
"pack_id" : "b7121f89-596e-476b-b81d-263fc27d984b",
"version" : [ 1, 0, 0 ]
}
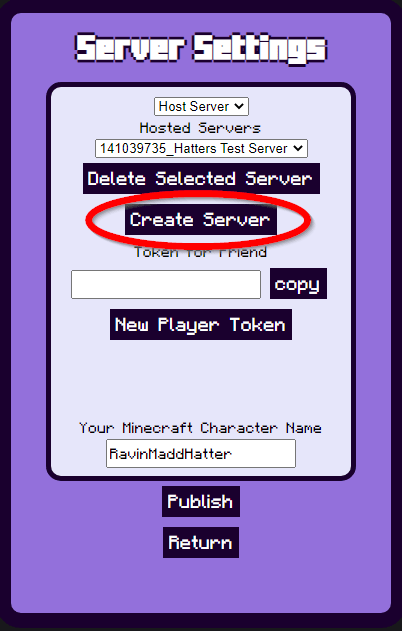
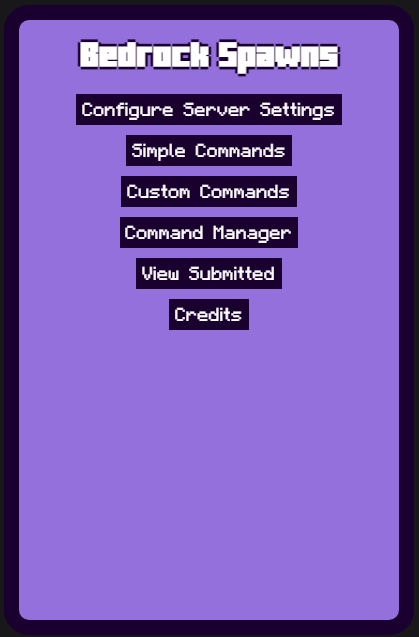
]Get a token for a new BDS server from the extension. First open the extension configuration. As shown in the image below, select Configure server settings>create server>get token>copy


Return to your BDS server and create a file at the location (not in the behavior pack in your root BDS) ./config/default/variables.json
put the copied data from the extension in that json file. This is an example (this server doesn’t work do not directly copy this). I have formatted this to add tabs, you are welcome to do that as well. but generally the information required is directly copied out of the token.
{
	"severName": "141039735_ENTER YOUR SERVER NAME",
	"key": "THIS IS A REALLY LONG STRING THAT IS USED AS A PASSWORD",
	"nickName": "ENTER YOUR SERVER NAME",
	"owner": "141039735"
}
Start your BDS server and join with at least 1 person you would like to have host.
tag the host person with host using in game commands (or commands through bds console)
tag PLAYERNAME add hostin chat type !help to get the list of custom commands you can use

Socket Connection
The socket connection program is much more limited than the behavior pack version, however it does allow for testing the commands without the need for logging in or a full install of BDS. This is recommended primarily for testing, but can be used for streams as well.
Step 1: Download either the EXE or the python code. The python code setup will not be covered in this section.
Git repo
Step 2: Get a token for a new BDS server from the extension. First open the extension configuration. As shown in the image below, select Configure server settings>create server>get token>copy


Step 3: In the same location you have placed the EXE or python file create variables.json
Put the copied data from the extension in that json file. This is an example (this server doesn’t work do not directly copy this). I have formatted this to add tabs, you are welcome to do that as well. but generally the information required is directly copied out of the token.
{
	"severName": "141039735_ENTER YOUR SERVER NAME",
	"key": "THIS IS A REALLY LONG STRING THAT IS USED AS A PASSWORD",
	"nickName": "ENTER YOUR SERVER NAME",
	"owner": "141039735"
}
Step 4: Run the EXE or python scrip, a command line window will pop up. At this point the redeems will show up in the command line, however these commands will only be executed if you connect in BDS
Step 5: In a world run /connect localhost:1234 this will allow the commands to run on your local game.
Configuring Commands
There are 2 types of commands in Bedrock Spawns, “Simple Commands” and “Custom Commands” to comply with Twitch Extension Guidelines “Custom Commands” cannot be used for bits until they have been reviewed. This process is to insure that “loot box” and other types of violations of the Extension guidelines are not sold for bits. Custom Commands can be submitted for me to review, this is a manual process that takes time. I apologies for delays.
Simple Commands
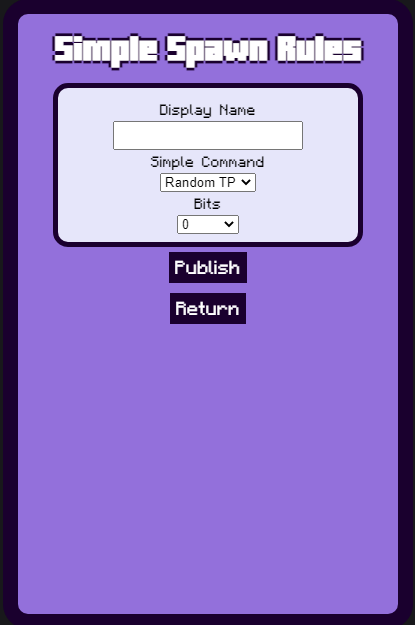
Simple Commands can be set up through the Simple Commands Field from the main menue. Simply select the command from the drop down, select the bits cost (if you are not affiliate, this will appear as 0) and add a display name. The display name is how it will show up in the panel on your channel. The bits price is the cost in bits. To test the command jump to the command manager section.
Command Manager
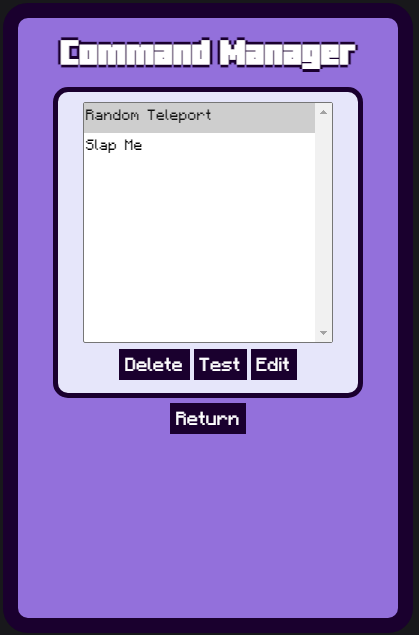
The command manager is how you remove commands, If there is a command that you feel is bugged, you can edit the command in the “Custom Command Tool” and submit it to be fixed. To test a command select the command and press “test”. To delete a command, select the command and press delete, to edit a command in the “Custom Command” tool press edit, Return will take you back to the main menu.
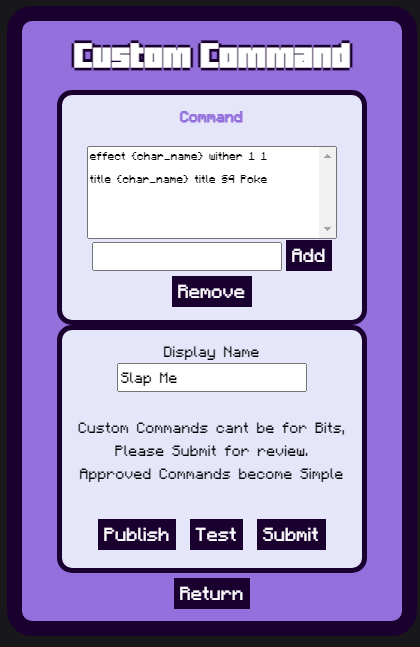
Custom Commands
Custom Commands are a bit more complex, as stated at the beginning they cannot be used with bits until after the command is approved. To build a custom command you simply enter commands 1 at a time in the field next to the add button. All commands will occur in the order displayed, however they will happen in rapid succession. if you want to reference a streamers in game name use {char_name}. @s will fail, and hard coding your player name will be rejected. The Remove button will remove the highlighted command in the commands box. To test you need to publish the command NOTE: Published commands will be active on your twitch page, The test uses the same method that the Viewer would use to insure it works for the viewer. Removed commands you do not want enabled through the command manager. The submit button will submit the command to be approved by the extension owner.

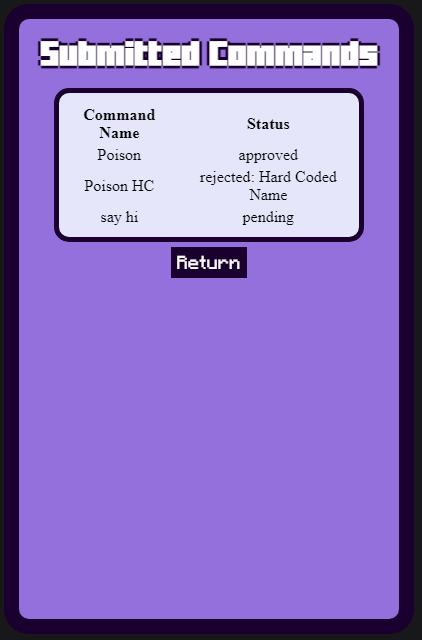
View Submitted
This will give you the real time status of your submitted commands. Note Rejected Commands are dead, a reason may or may not be given. You can be banned from submitting, the person submitting is tracked and if you abuse the system your twitch account will be banned from submitting command sets.
Credits
This page simply shows the credits for the fonts that were used in the page